This tutorial explains how you can automate a big part of your manual Excel accounting and significantly reduce the time you have to spend on manually entering numbers for invoices, bills and bank statements.
If you don’t yet have a Filemad account, please fullow this tutorial on how to create an account.
Also, this tutorial goes into more depth on how to deal with bills, invoices and POs. If you are interested in parsing bank statements, please go to this tutorial on how to convert bank statements to Excel.
Create a Workspace
To get started, click on the middle part in your dashboard.
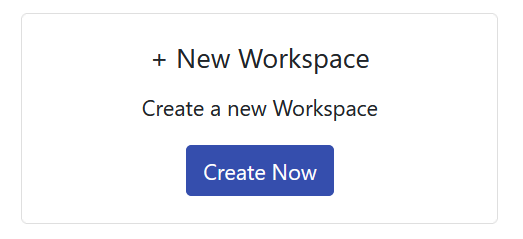
Next look for “+ New Workspace” and click on “Create Now”.
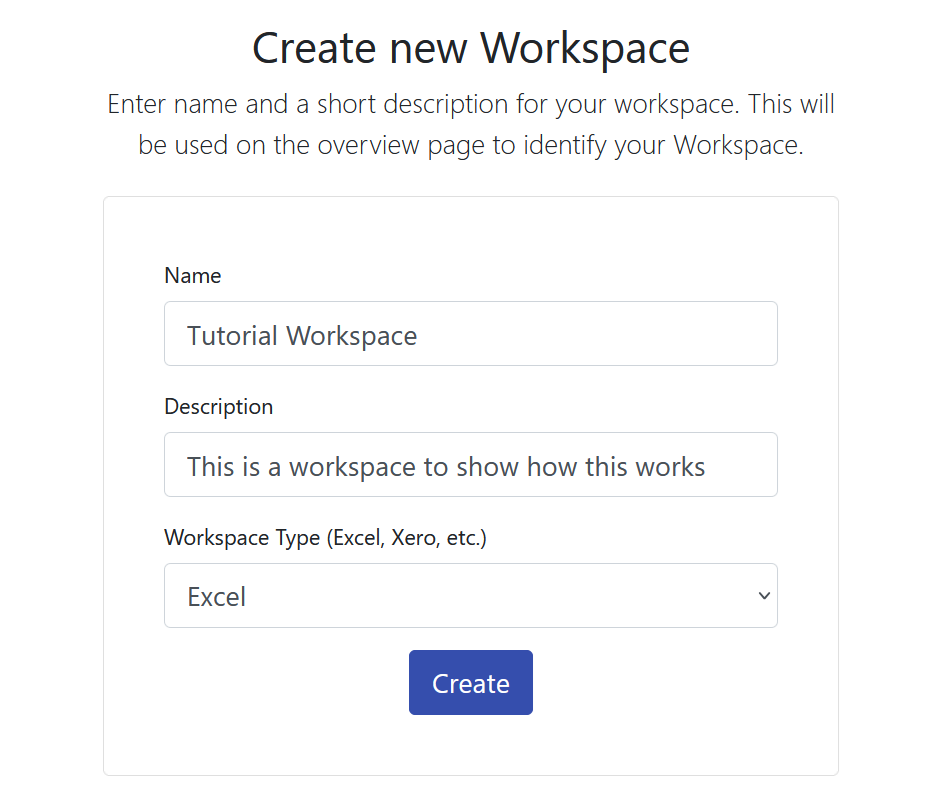
Enter the information for this workspace. This could be your client’s name and information, the use-case you’re using the workspace for or department information for use inside your company.
Make sure to pick “Excel” for Workspace Type, there are others available that work and behave slightly differently to the Excel ones.
Click on “Create” to set up the Workspace.
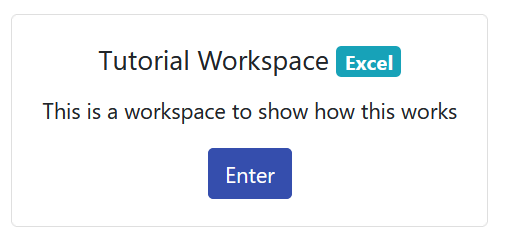
You should now see your new Workspace in the overview page. To start using it, click “Enter”.
Set up your columns
Before you do anything, scroll down to “Configure CSV Column Order”.
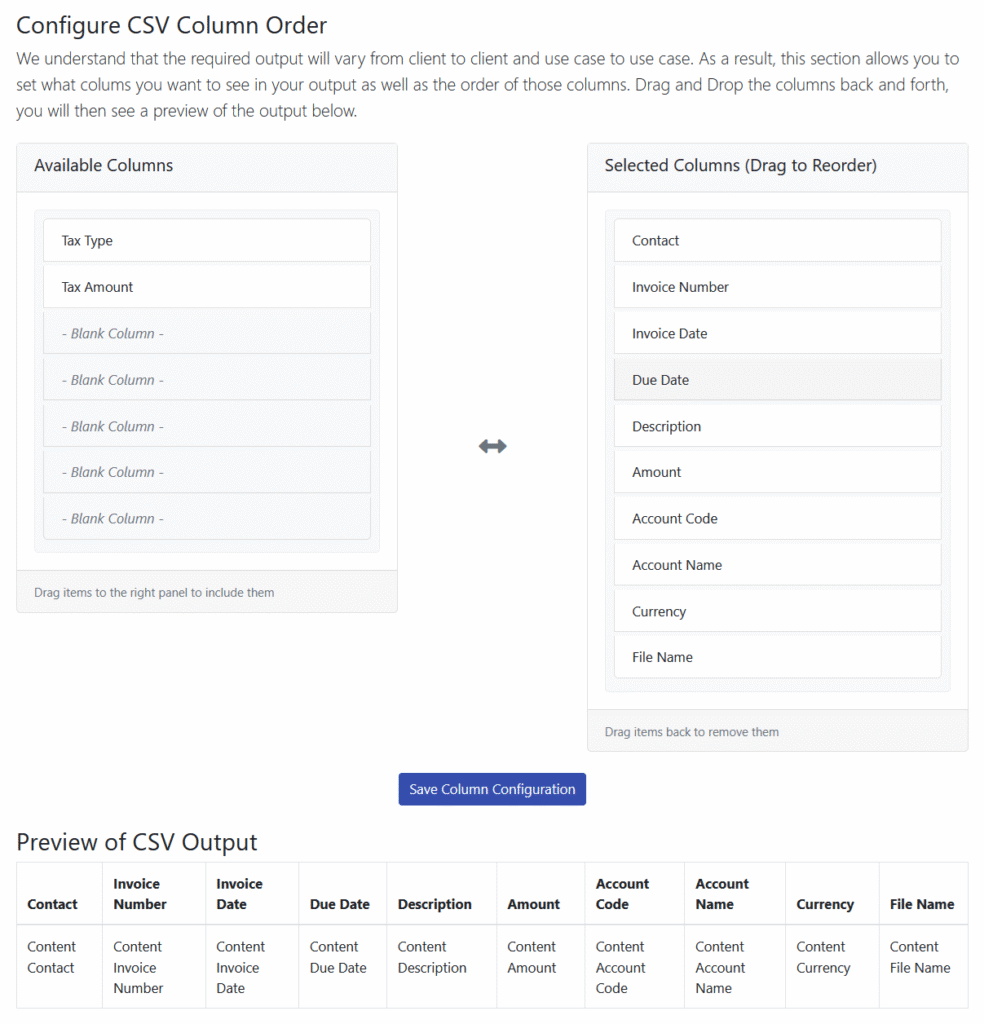
This section allows you to configure the order of the columns in the Excel output + add/remove columns as you wish.
This was added to allow for maximum flexibility, as every Excel accounting template will look slightly different and we wanted to make sure our application can service most of them.
To make this work, drag&drop the various fields between “Available Columns” and “Selected Columns”. If a field is in “Available Columns” it means it won’t be in the output. Everything under “Selected Columns” will be in the output.
Under “Preview of CSV Output” you can see live how your output Excel file will look like and you can make changes accordingly.
After finishing everything, make sure to press “Save Column Configuration” to save all changes.
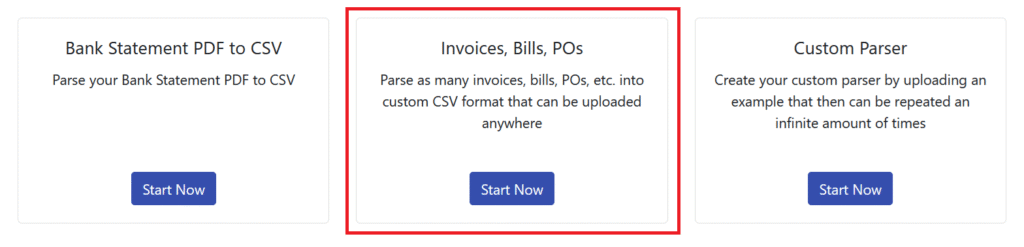
Convert Bills & Invoices
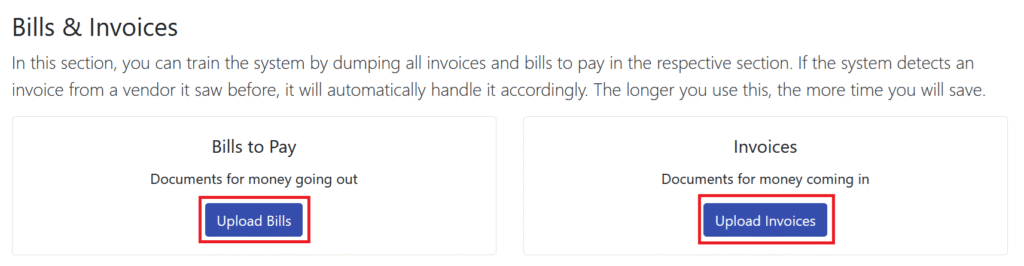
To get started with converting bills and invoices, click on either “Upload Bills” or “Upload Invoices”. As you can see on your screen “Bills” would cover anything where money is being spent, “Invoices” covers everything where money is earned.
Both work exactly the same way, so for this tutorial we only cover “Bills”. Click on “Upload Bills” to get started.
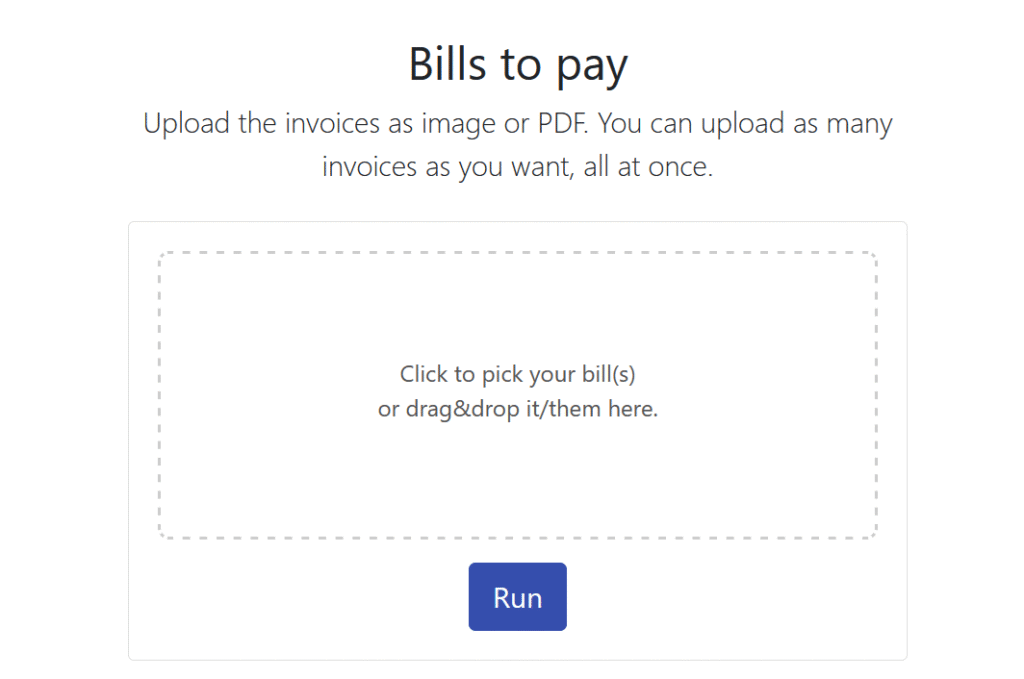
Then either drag&drop the bills into the grey area or click on it and pick the bills you want to process in the dialog that opens. You can pick up to 500 PDFs or images at once.
When that’s done, click on “Run”
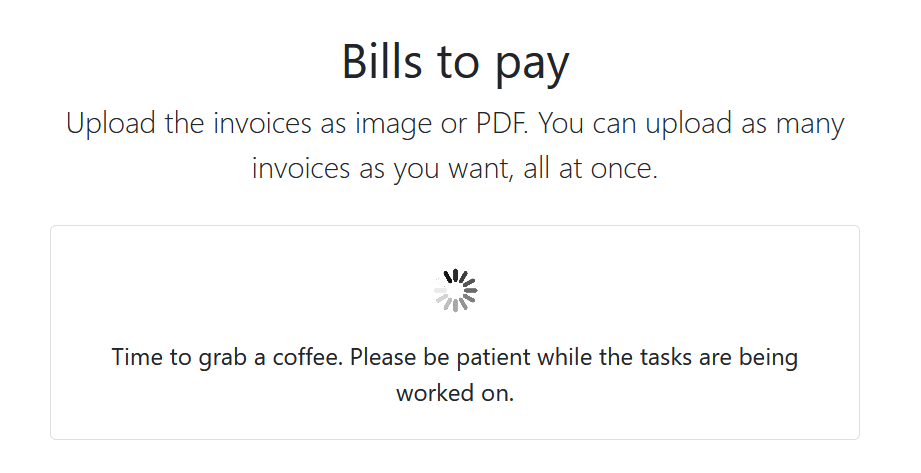
Depending on how many files you uploaded, this might take some time. Safe estimate is roughly 30s per uploaded file. However, this will also depend on how much information you have already entered about providers in the past. If the Workspace is completely new, you will soon have to enter information.

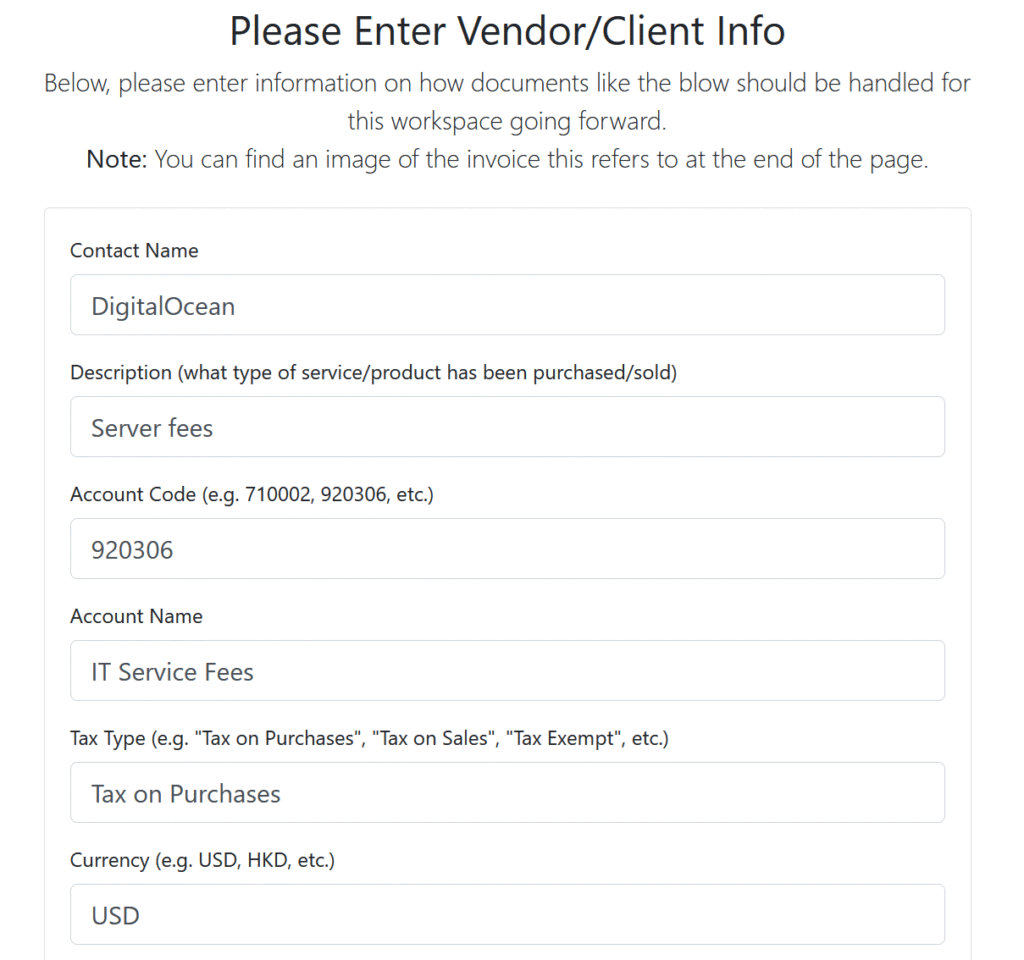
The screen to enter vendor/client information will look something like the above (part 1). Here you need to enter various information that is then stored and used automatically again when the system parses another bill from that vendor in the future. But it has to be input once in the beginning unfortunately.
To know what invoice this is referring to, scroll to the end of the page, there you will see a screenshot of the invoice/bill you have to input the data for.
Here’s what the various fields mean:
Contact Name refers to name for the vendor or client you are currently using in your system. That might be an ID, company name or any other key or string referring to that very client.
Description is the description for the type of service or product you purchase or provide to/from the vendor/client.
Account Code is the code of the account the payment gets booked under
Account Name is the name of the account the payment gets booked under
Tax Type refers to the amount of tax that is payable for this transaction
Currency is the currency payments for that vendor/client are usually conducted in
Note that you can leave any of those empty if you wish.
For the invoice in this tutorial, the entered information might look like this:
Now to part two, which will be covered in more detail further down below.
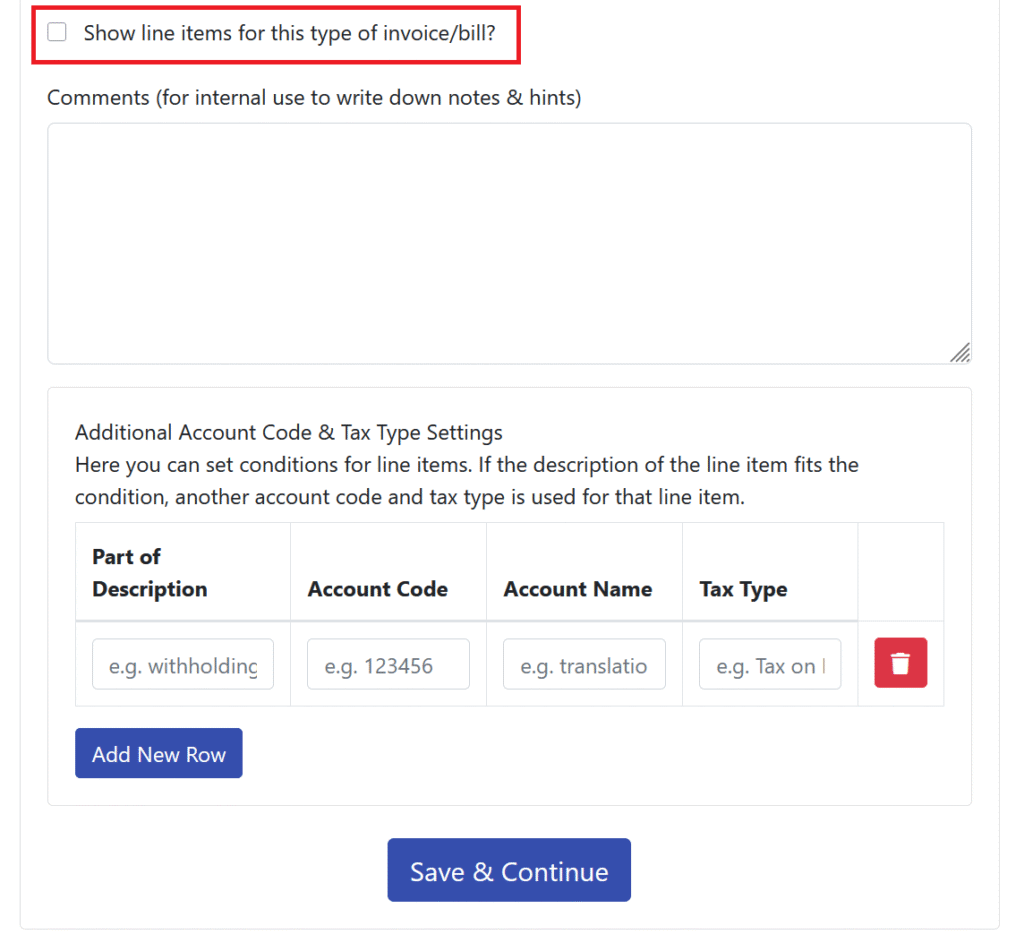
The most important part here is the checkbox Show line items for this type of invoice/bill? If you tick this, then the system will parse out all line items in the invoice and present each of them in the output as 1 line. If you don’t tick it, the whole invoice would be represented by 1 line in the output with the overall amount being shown as amount. For most use cases in Excel accounting, you would leave this unticked, so we’ll do that here.
If you tick this box, you would be able to, for example, book the earned amount under a certain account and withholding tax under another account. More on this, as mentioned, further down in this tutorial.
Comments is simply a field where you can enter notes for future reference. Always good to write down the why for what you did because you probably won’t remember in 1-2 years time.
When everythting is done, click on “Save & Continue”.
Enter information for all vendors/clients until you’ve worked through all invoices. Once that’s done, you’ll get to the result page.
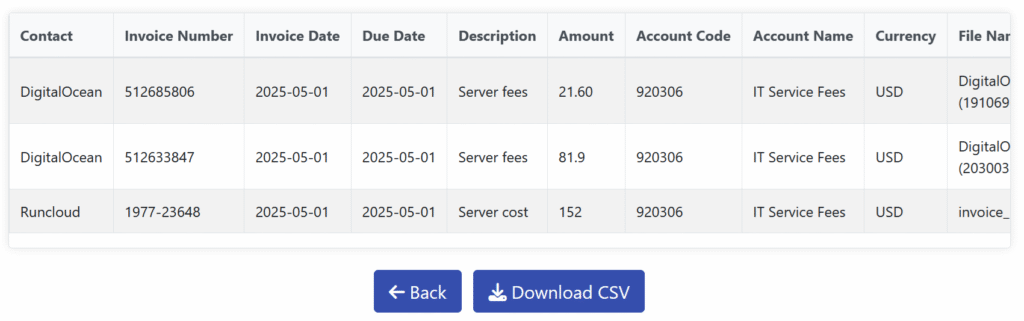
The result will be presented to you in the format with the columns and order you set as described above in this tutorial.
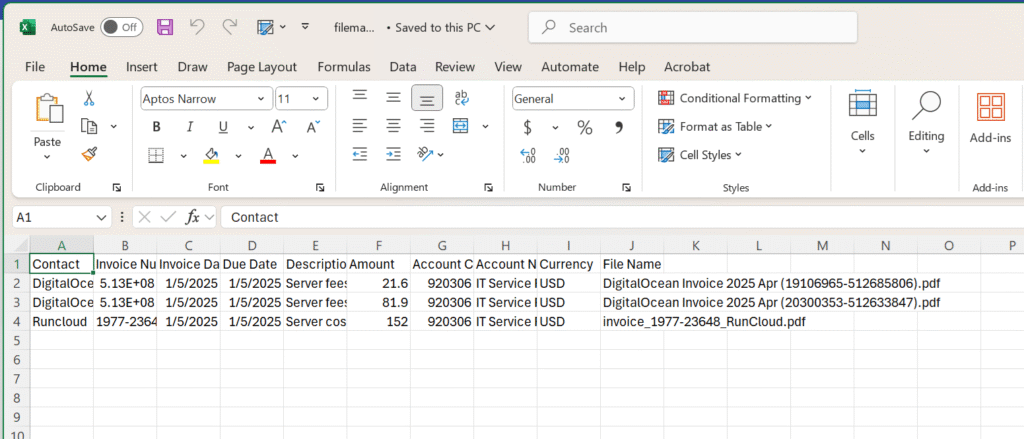
To download for use in Excel, click on “Download CSV”. This downloaded file would look something like this:
When you click on “Back”, you’ll get back to your Workspace.
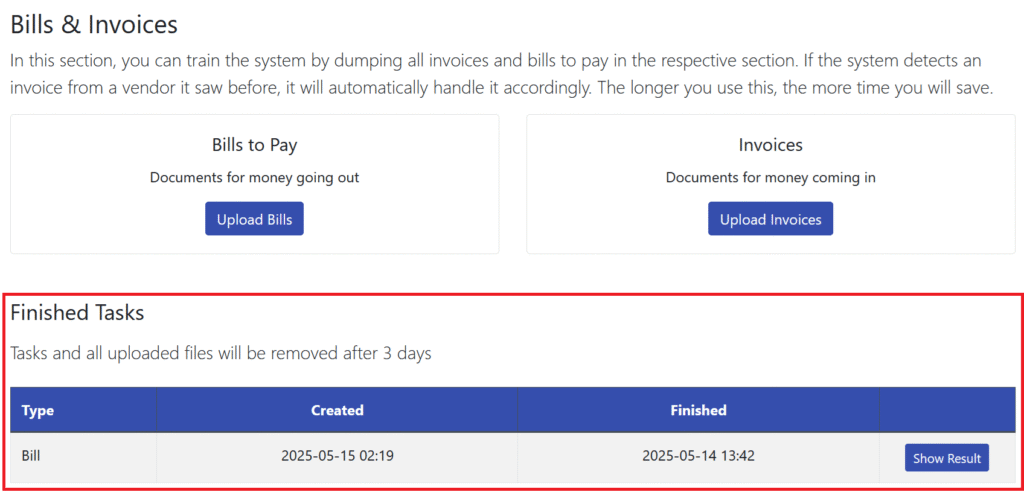
Here you will then see all finished tasks under the section “Finished Tasks”. They will be there for 3 days, then all files and results related to this task will automatically be deleted from the server, the only things that stay in the database are the information you entered for vendors and clients.
Client & vendor information
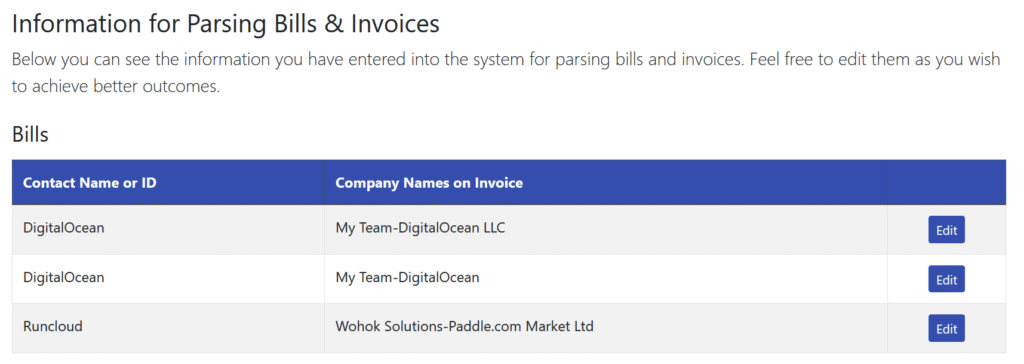
When you now scroll down a bit, you’ll see a section called Information for Parsing Bills & Invoices. There you will find all the information you have entered during the parsing process. You can edit that information at any time to make changes for future parsing processes.
Now when I upload a DigitalOcean bill, for example, I would not have to re-enter the information I just entered, it would automatically take the information from the database.
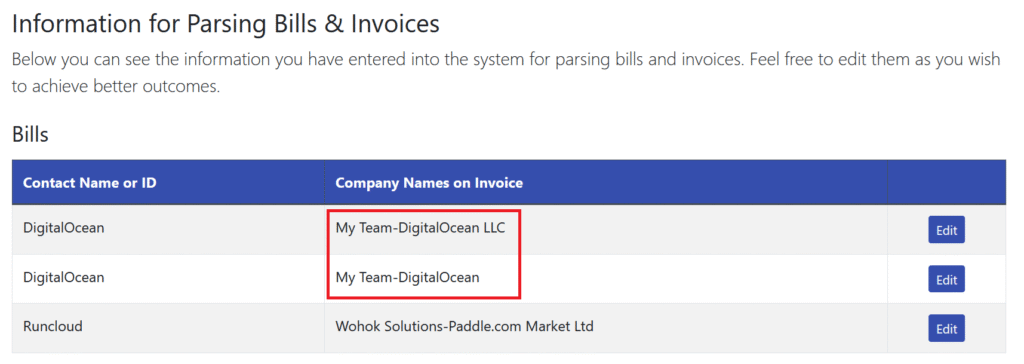
So why are there two DigitalOcean entries? This is, unfortunately, a small issue still. The system is not 100% consistent in the way it reads and parses company names. Sometimes is adds “LLC”, sometimes not. Sometimes it adds the “Limited”, sometimes not. Very much like a human would do.
This results in the unfortunate problem that you might have to enter information twice. We are working on the problem to see if we can find a convenient work-around for this.
Line items
Now, as promised, some more information on how to deal with line items in an invoice or bill.
Let’s for example take this invoice here:
Here we have two line items in the invoice. For this invoice, I have the following settings for part 2:

So, what does that do:
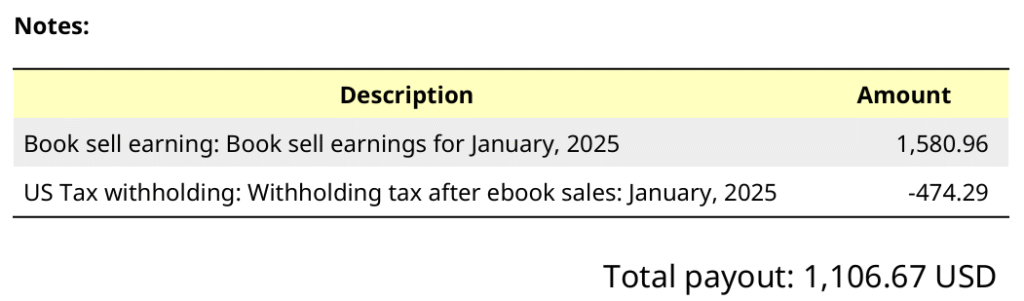
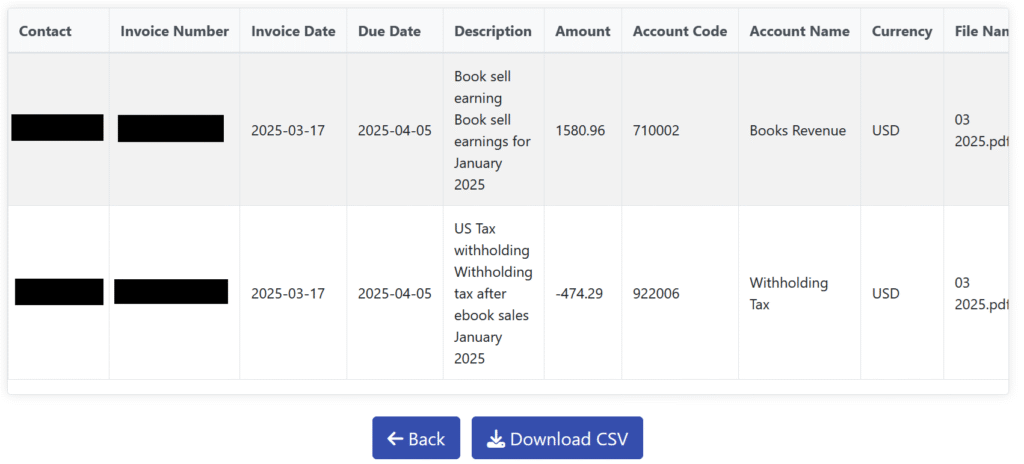
First, ticking the checkbox Show line items for this type of invoice/bill? means that all line items are shown separately in the output (2 in this case). That means, line 1 will be over USD 1580.96, line 2 will be for -474.29.
If I would untick that checkbox, there would only be one line for this invoice with an amount of 1106.67.
However, second problem here is that I want to book the two line items under different accounts. Here’s how to do that.
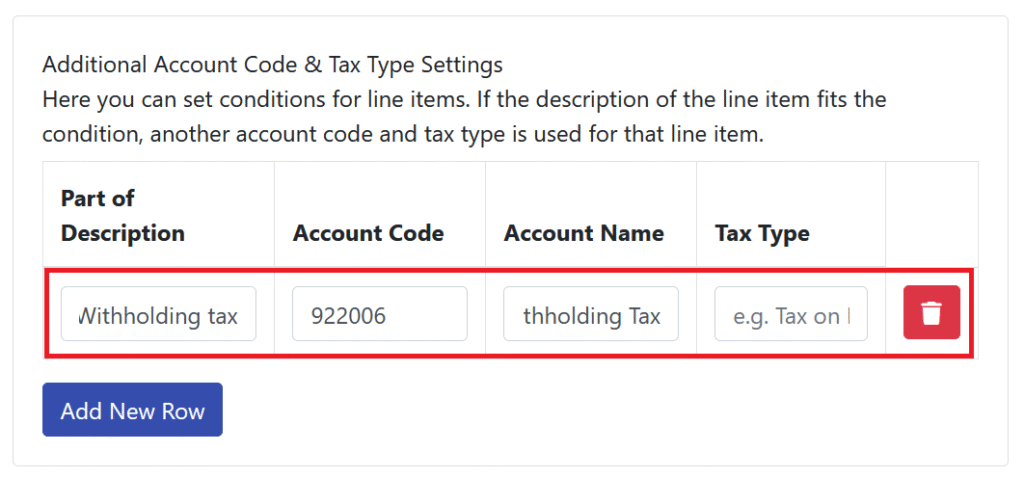
When the checkbox is ticked, you can make use of the area that is circled in red in the image above. This works like this:
In Part of Description, you enter a key word or key phrase that is in the description for the line item. In this case we used “Withholding tax”. Make sure it’s spelled exactly like in the line item description.
Next enter the Account Code, Account Name and Tax Type that you would want to use for line items like this.
You can add as many lines like this as you want using “Add New Row”.
This setting will then result in the output that any line that matches the phrase “Withholding tax” will be using Account Code 922006, Account Name “Withholding Tax” and empty “Tax Type”, all other line items will use the standard information entered in part one.
The output would then look something like this:
Workspace comments
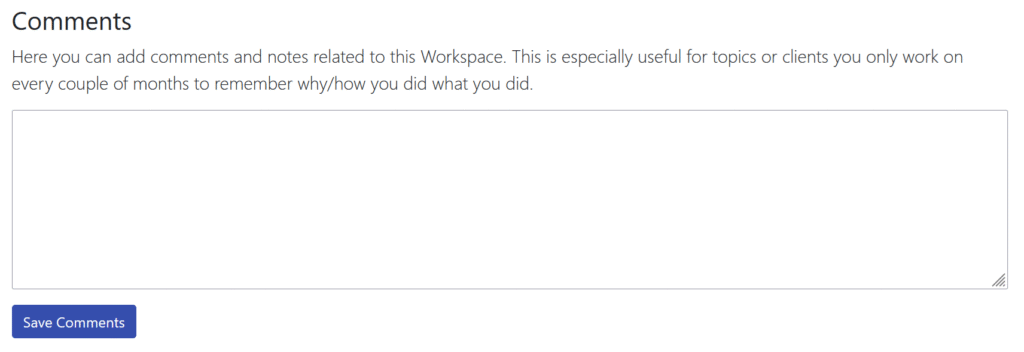
Finally, to end this tutorial, a simple comments section where you can enter comments about this client, department or use-case that you want to remember next time you work with this Workspace.
There are clients you might only work on once a year and things you know now you won’t remember in 1 years time. This area is for notes to remember; things that are important and otherwise easily lost.